Kitchen Single Sink
The installation steps for a stainless steel Kitchen Single Sink are as follows:
preparation
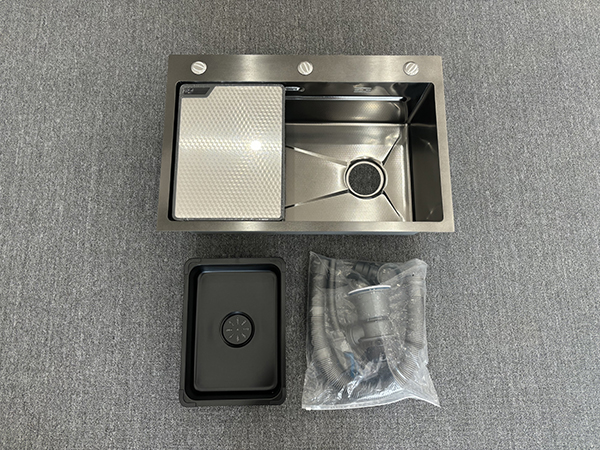
Confirm sink and accessories: Check whether the specifications and dimensions of the sink match the installation holes reserved on the kitchen countertop, whether the sink is damaged or deformed, and whether the accessories are complete, generally including the sink body, faucet, soap dispenser, drain, installation screws, sealing glue, etc.
Preparation tools: Screwdrivers, wrenches, glass glue guns, level rulers, pencils, tape measures, and other tools need to be prepared.
Cleaning the countertop: Before installation, clean the kitchen countertop and installation area, remove dust, debris, etc., and ensure that the installation surface is flat and clean.
Installation of basin on stage
Marking and positioning: Place the sink on the countertop and draw the outline and installation hole position of the sink on the countertop with a pencil according to its size and shape.
Cutting installation holes: Use a suitable tool (such as a cutting machine) to cut the installation holes on the table according to the markings. Pay attention to safety when cutting, try to ensure that the cutting surface is smooth and even, and avoid cracks or gaps. After cutting, clean the burrs around the installation holes.
Install faucet and soap dispenser: Install the faucet and soap dispenser in front of the sink in front of the countertop, and first install them in the corresponding holes on the sink. According to the product manual, use a wrench or other tools to tighten the fixing nuts of the faucet and soap dispenser to ensure a secure installation without water leakage.
Apply sealant: Apply a layer of sealant evenly on the edges of the sink and the installation holes on the countertop. The purpose of the sealant is to prevent water from leaking through the gaps between the sink and countertop.
Install sink: Place the sink smoothly into the mounting hole on the countertop, aligning the edge of the sink with the mark on the countertop. Gently press the sink to evenly fill the gap between the sink and the countertop with sealant. Use a spirit level to check if the sink is installed horizontally, and adjust it promptly if there is any deviation.
Fixed sink: Depending on the installation method of the sink, use screws or other fasteners to secure the sink to the countertop. Usually, there are some mounting holes at the bottom of the sink, through which screws are tightened to tightly connect the sink with the countertop.
Connect the drain: Install the drain at the drainage outlet of the sink to ensure a good seal between the drain and the sink. Then connect the drainage pipe to the drain, paying attention to using sealant or sealing rings at the connection to prevent water leakage.
Clean up excess sealant: After installation, wait for the sealant to dry and solidify. Use a damp cloth or scraper to clean up the excess sealant on the edge of the sink and the countertop, making the connection between the sink and countertop clean and beautiful.
Installation of basin under the stage
Cutting installation holes: Similar to the installation of basins on the table, mark and cut installation holes on the table according to the size of the sink. However, the installation hole size of the basin under the table should be slightly smaller than the outer edge size of the sink to ensure that the sink can be embedded under the table and closely fit with the table.
Installation of faucet and soap dispenser: Install the faucet and soap dispenser on the sink using the same steps as on the sink.
Sink positioning: Invert the sink and place it on the countertop, aligning the edge of the sink with the mounting hole on the countertop. Use a pencil to mark the position where the edge of the sink contacts the countertop, in order to determine the accurate position of the sink during subsequent installation.
Apply sealant: Apply sealant to the edges of the sink and the marked areas on the countertop, ensuring that the sealant is evenly applied and of moderate thickness.
Install sink: Carefully flip the sink over and insert it into the mounting hole below the countertop, ensuring that the edge of the sink is in full contact with the sealant on the countertop. Use a spirit level to check if the sink is level, and adjust it if necessary.
Fixed sink: The sink is usually fixed under the countertop using specialized installation accessories such as hangers, screws, etc. Install the hanging piece on the edge of the sink, and then fix it tightly to the countertop with screws. During the fixation process, it is important to ensure a good seal between the sink and the countertop, and to keep the sink level.
Connect the water trap and drainage pipe: Follow the same installation steps as the basin on the platform, install the water trap and connect the drainage pipe to ensure that the connection is sealed and leak proof.
Cleaning: After installation, clean the debris and dust on the sink and countertop, and wait for the sealant to dry and solidify.
Taichung Basin Installation
Precise cutting of installation holes: The installation of Taichung basin requires very high dimensional accuracy of the installation holes, and professional cutting equipment is needed to cut the installation holes on the countertop according to the precise size of the sink, ensuring that the edges of the installation holes are neat, smooth, and the size matches the sink perfectly.
Polishing treatment: After cutting, polish the edge of the installation hole to achieve a certain degree of flatness and smoothness, so as to closely fit with the edge of the sink.
Install faucet and soap dispenser: Before installing the sink, first install the faucet and soap dispenser on the sink.
Apply sealant: Apply sealant to the edges of the sink and the installation holes on the countertop.
Install sink: Place the sink smoothly into the installation hole, ensuring that the edge of the sink is level with the countertop. Due to the high installation requirements of the Taichung basin, multiple people may need to cooperate to ensure the accurate installation position of the sink, and the sealant between the sink and the countertop is evenly filled.
Fixed sink: Use screws or other fixing methods to secure the sink to the countertop, with evenly distributed fixing points to ensure a tight fit between the sink and countertop.
Connect the sinker and drainage pipe: Install the sinker and connect the drainage pipe to ensure that the drainage system is well sealed.
Cleaning and inspection: After installation, clean the sealant residue and debris on the sink and countertop, check whether the sink is installed horizontally, whether the faucet, soap dispenser and other accessories are working properly, and whether the drainage is smooth.
How to choose a sink suitable for your kitchen?
Choosing a sink that suits your kitchen requires comprehensive consideration of multiple fa ...
2025-05-12
Possible issues that may arise during the use and installation of kitchen sinks
There may be various problems during the use and installation of kitchen sinks, and the fol ...
2025-05-12
How to choose a suitable stainless steel sink
A good stainless steel sink uses thicker plates,and the thickness can be determined by slig ...
2025-04-10
How to choose a kitchen sink
Stainless steel:It has the advantages of strong corrosion resistance,not easy to rust,easy ...
2025-04-10