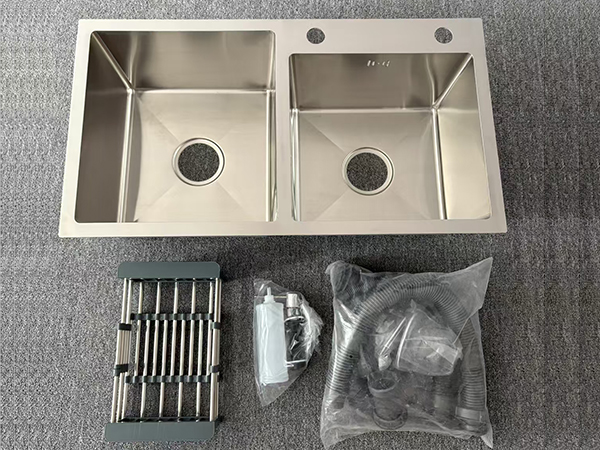
Double Kitchen Sink
The installation steps for the stainless steel Double Kitchen Sink are as follows:
preparation
Confirm sink and accessories: Check the appearance of the sink for damage, deformation, and other issues, and confirm that the accessories are complete, including the drain, faucet, soap dispenser, etc.
Preparation tools: Prepare the necessary tools for installation, such as screwdrivers, wrenches, glass glue guns, level rulers, pencils, tape measures, etc.
Measure the opening size: Based on the size of the sink, accurately measure and mark the position and size of the opening on the kitchen countertop. Ensure that the opening size matches the external dimensions of the sink, as the opening size of a sink is generally slightly smaller than its actual size.
Cutting table top
Cut the kitchen countertop using a professional cutting tool (such as a stone cutting machine) according to the marked hole size. When cutting, pay attention to keeping the cutting line straight and accurate, and avoid cutting sizes that are too large or too small.
After cutting, polish and trim the edges of the opening to make it smooth and even, avoiding sharp edges that may scratch the sink or user.
Install sink
Installation of basin under the table:
Invert the sink and place it on the countertop, aligning the edge of the sink with the edge of the opening on the countertop. Use a pencil to draw the installation line along the edge of the sink on the countertop.
Apply glass glue evenly on the edge of the sink, then carefully place the sink into the opening to ensure that it completely overlaps with the installation line. Use fixtures or heavy objects to fix the sink on the countertop and wait for the glass glue to dry and solidify.
Connect the drain and drainage pipe. Install the drain on the drainage hole of the sink to ensure good sealing. Then connect the drainage pipe to the drain in the correct way, paying attention to the tight connection of the pipe to avoid water leakage.
Installation of basin on stage:
Place the sink directly on the opening on the countertop, so that the edge of the sink covers the edge of the opening. Adjust the position of the sink to be horizontal and level with the surrounding countertops.
Seal the contact area between the sink and the countertop with glass glue. First, evenly apply a layer of glass glue on the countertop, then gently press the sink onto the countertop to fully fill the gap between the sink and the countertop with the glass glue. Wipe off excess glass glue and wait for it to dry and solidify.
Similarly, install the drain and connect the drainage pipe to ensure the sealing of the drainage system.
Install faucets and other accessories
Install the faucet in the corresponding position of the sink. According to the type of faucet and installation requirements, use a screwdriver or wrench to secure the faucet to the sink. Connect the water inlet pipe of the faucet to ensure a secure connection and no leakage.
Install soap dispenser and other accessories. Install according to the instructions of the accessories, usually by fixing the bottle of the soap dispenser on one side of the sink, and then connecting the outlet pipe to the appropriate position.
Testing and Inspection
After installation, turn on the faucet and inject an appropriate amount of water into the sink to check for any water leakage. Observe whether there are water droplets seeping out from the connection between the sink and the countertop, the connection between the drain and the sink, and the various interfaces of the drainage pipe.
Check if the water outlet of the faucet is normal, if the water flow is smooth, and if the switch is flexible. At the same time, test whether the soap dispenser and other accessories are functioning properly.
Use a spirit level to check if the sink is level. If the sink is not level, it may cause uneven accumulation of water in the sink, affecting the effectiveness of use. If necessary, adjust the sink.
Cleaning and Closing
After installation, clean the countertop of debris, dust, and residual glass glue. Wipe the sink and countertop with a clean damp cloth to keep them clean.
Properly dispose of the packaging materials of the sink and the waste generated during installation to maintain a clean kitchen environment.
When installing a stainless steel double sink, the following precautions should be taken:
The installation position of the sink should avoid the support structure of the cabinet, ensuring sufficient space below the sink for installing drainage pipes and conducting daily maintenance.
During the installation process, attention should be paid to protecting the surface of the sink to avoid being scratched by tools. You can stick a protective film on the surface of the sink and remove it after installation.
The selection of glass adhesive is very important. It should be of good quality, anti mold, and waterproof to ensure the sealing effect and service life.
The installation of drainage pipes should ensure the correct slope, generally requiring a slope between 2% and 5% to ensure smooth drainage, prevent water accumulation and backflow.
After installation, wait for the glass adhesive to fully dry and solidify before using the sink. Generally, it takes about 24 hours, and the specific time depends on the instructions of the glass adhesive.
How to choose a sink suitable for your kitchen?
Choosing a sink that suits your kitchen requires comprehensive consideration of multiple fa ...
2025-05-12
Possible issues that may arise during the use and installation of kitchen sinks
There may be various problems during the use and installation of kitchen sinks, and the fol ...
2025-05-12
How to choose a suitable stainless steel sink
A good stainless steel sink uses thicker plates,and the thickness can be determined by slig ...
2025-04-10
How to choose a kitchen sink
Stainless steel:It has the advantages of strong corrosion resistance,not easy to rust,easy ...
2025-04-10